If you’re managing an AWS EC2 instance and tired of juggling complex command-line file transfers, it’s time to simplify your workflow. Connecting to AWS EC2 with WinSCP offers a smooth, secure way to handle your cloud server file management without the hassle. Whether you’re uploading code, grabbing logs, or organizing directories, WinSCP’s intuitive interface and robust SFTP support turn what used to be a headache into a straightforward task. In this guide, you’ll get hands-on steps and expert tips to seamlessly connect, transfer, and manage files on your EC2 – all from your Windows desktop. Let’s get you set up and saving time today!
Prerequisites: What You Need Before Connecting
Before you connect to your AWS EC2 instance using WinSCP, there are a few essentials you need to have in place to ensure a smooth setup.
AWS Setup Essentials
- Active AWS Account: Make sure you have an active AWS account.
- Launched EC2 Instance: Your EC2 instance must be running with a public IP address or DNS name accessible from your location.
- Security Group Settings: Configure your EC2 security group to allow inbound SSH traffic on port 22 from your IP address. This is crucial for SFTP connections.
Key Requirements
- Download Your .pem Key: Retrieve the private key file (.pem) from the EC2 console when you launch your instance. This key authenticates your connection.
- Instance Username: Know the default username for your instance’s OS:
- Amazon Linux: ec2-user
- Ubuntu: ubuntu
- Others: Check AWS documentation for specifics.
Software Installation
- WinSCP: Download and install WinSCP for free from winscp.net. It’s a popular and reliable SFTP client for Windows.
- PuTTY and PuTTYgen (Optional): These tools are useful if you need to convert your .pem key to a .ppk file, which WinSCP requires for authentication.
Quick Checklist
| Item | Description |
|---|---|
| AWS EC2 Instance | Running with public IP/DNS |
| .pem Key File | Downloaded from AWS EC2 console |
| WinSCP | Installed and ready to use |
| Firewall Rules | SSH port 22 open for your IP |
Pro Tip
If you manage multiple EC2 instances, consider enabling AWS Systems Manager (SSM). It allows you to connect without managing SSH keys, simplifying access and improving security.
Having these prerequisites ready will set a solid foundation for connecting to your EC2 instance with WinSCP confidently.
Preparing Your SSH Key: Convert .pem to .ppk for WinSCP Compatibility
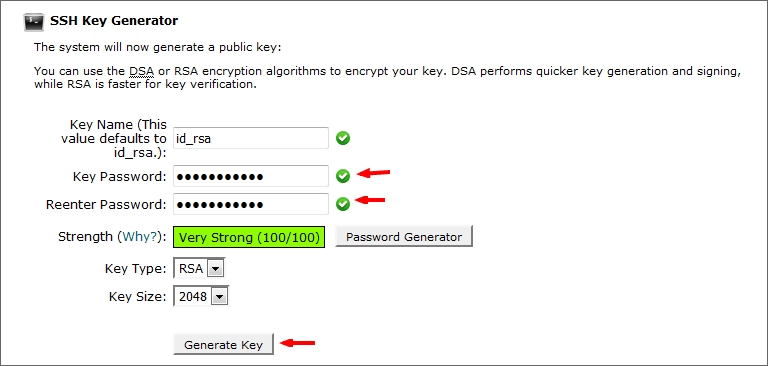
AWS gives you a .pem file for your EC2 instance’s SSH key, but WinSCP needs the .ppk format (PuTTY’s private key format) to connect. So, converting your key is a must before you can upload or download files.
Here’s how to convert your .pem to .ppk using PuTTYgen:
- Open PuTTYgen (comes with the PuTTY installer from PuTTY’s website).
- Click Load, and browse to your .pem file. Make sure to select All Files in the file dialog so you see your .pem.
- (Optional) Add a passphrase for better security if you want.
- Click Save private key and save your key as a .ppk file.
Quick tips:
- If you prefer, WinSCP also lets you import your .pem directly in some versions. Look under “Load private key” during authentication setup.
- Keep your .ppk file safe—never share it publicly or add it to version control.
- Common errors include loading the wrong file type or mismatched usernames; PuTTYgen’s prompts usually tell you if something’s off.
For visual help, try checking PuTTYgen interfaces with numbered steps online. This simple process is a key step in making sure your SSH key authentication in WinSCP works smoothly.
For related info on secure transfers and managing keys, you might want to check the WinSCP AWS EC2 guide.
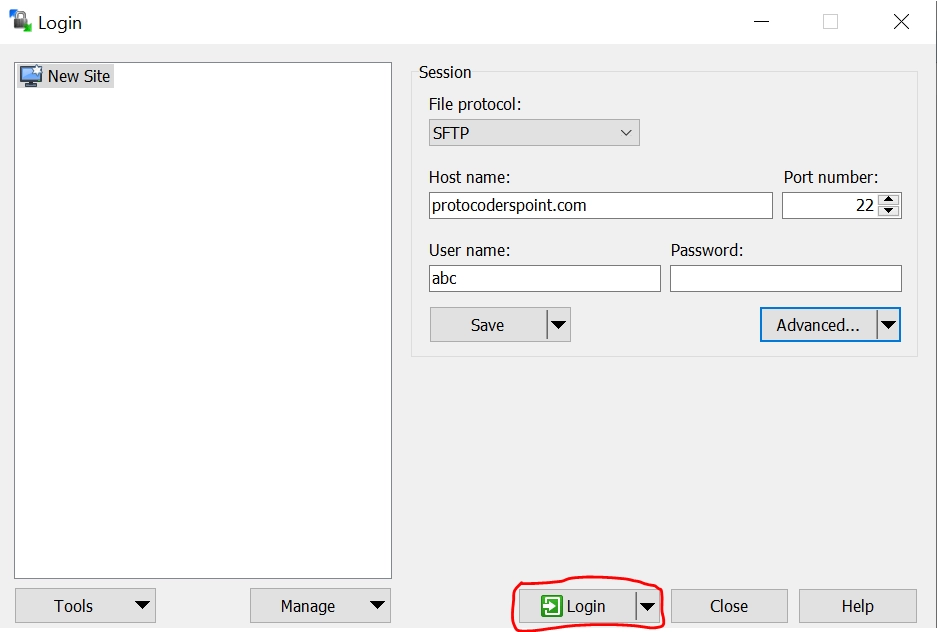
Configuring and Connecting to Your EC2 Instance in WinSCP
Start by launching WinSCP and creating a new site for your AWS EC2 connection. Here’s the quick setup you need:
- File protocol: Select SFTP (this is the secure way to transfer files).
- Host name: Enter your EC2 instance’s public IP address or DNS name.
- Port number: Use 22, the default SSH port.
- Username: Use the proper EC2 instance username—typically ec2-user for Amazon Linux or ubuntu for Ubuntu instances.
Next, set up authentication:
- Go to Advanced > SSH > Authentication.
- Use the Browse button to load your converted .ppk private key file.
If you’re behind a corporate firewall or proxy:
- Enable “Try agent” to connect with Pageant (PuTTY’s SSH agent).
- Add proxy settings under Connection > Proxy if needed.
Before you connect, give your session a clear name and save it for future use. When you hit Login, you might see a prompt to accept the host key fingerprint for the first time—just confirm it to proceed.
Common Connection Issues
| Problem | Quick Fix |
|---|---|
| Connection timed out | Check your EC2’s security group allows SSH (port 22) from your IP |
| Authentication failed | Confirm username and that the correct .ppk key is loaded |
| Host key not found | Accept the server’s host key the first time connecting |
Once connected, WinSCP opens up a dual-pane view—your PC’s files on one side, and your EC2 instance’s file system on the other. You’re now ready to manage your cloud server files efficiently.
Mastering File Management: Upload, Download, and Organize on Your Cloud Server
Using WinSCP with your AWS EC2 instance makes file management straightforward and efficient. Here’s how to get the most out of it:
-
Drag-and-Drop Uploads/Downloads: Simply drag files from your local machine to the remote EC2 server or vice versa. You can also select multiple files at once to speed up transfers.
-
Directory Navigation: Browse your EC2 instance’s file system easily. Create new folders directly in WinSCP to keep things organized on your cloud server.
-
Batch Transfers: Queue up multiple files or folders for transfer. If something interrupts the process, you can resume it without starting over.
-
Permissions Handling: Change file permissions (chmod) right from WinSCP. If you need elevated rights, use sudo integration to modify protected files smoothly.
-
Synchronization Tools: Use the Synchronize feature to mirror folders between your local system and EC2 instance. This is perfect for keeping backup copies or deploying website updates.
-
Real-World Examples: Upload a website archive to your server for deployment or download log files for troubleshooting.
-
Performance Tips: Turn on compression during transfers to save bandwidth. Limit concurrent file transfers if your connection gets overloaded to keep things stable.
With these tools, WinSCP makes managing files on your AWS EC2 instance hassle-free, letting you focus more on your projects and less on file handling.
Advanced Techniques: Beyond Basic Transfers for Power Users
When you’ve got your basics down with WinSCP and AWS EC2, it’s time to level up with some advanced methods that save time, enhance security, and scale better.
VPC and Private Subnet Access
If your EC2 instance is inside a private subnet, WinSCP can still reach it by tunneling through a bastion host or using a NAT gateway. You set up an SSH tunnel on your local machine to route the connection securely through the jump server. This is essential for secure cloud server file management without exposing private IPs.
Keyless Connections with AWS SSM Session Manager
AWS Systems Manager (SSM) allows you to skip SSH keys entirely. With SSM Session Manager, you can connect to your instance directly from WinSCP using the agent, which means no key conversion or management headaches. It’s excellent for managing multiple instances without juggling PEM or PPK files.
Scripting Automation
WinSCP supports automation through its .NET assembly and PowerShell scripts. You can automate file transfers, synchronize directories, or run repetitive tasks without manual intervention. This is handy in deployment pipelines or routine backups.
PuTTY Integration for Instant SSH
WinSCP pairs effortlessly with PuTTY, offering a quick SSH terminal directly from its toolbar. Once logged in via SFTP, you can open a terminal session for interactive commands without switching apps, streamlining your workflow.
Monitoring Transfers with Logging and AWS CloudWatch
For heavier workloads, enable WinSCP’s transfer logging. Combine this with AWS CloudWatch to monitor file transfer statuses, failures, and performance metrics on your EC2 instances. Tracking helps spot issues early and optimize session throughput.
Scaling for Teams
Working with a team? WinSCP lets you share site configurations so everyone uses the same connection settings and authentication methods. Pair this with AWS IAM role-based access to enforce least privilege permissions, keeping your environments secure and making collaboration smoother.
Using these advanced techniques can make your cloud server file management more secure, efficient, and ready for scale. For more on securing and managing EC2 connections, check out our guides on AWS EC2 file management and WinSCP SSH key authentication.
Security Best Practices: Keep Your EC2 File Transfers Locked Down

When managing files on your AWS EC2 using WinSCP, security should be top priority. Here’s how to keep your transfers tight and secure:
Key Management
- Rotate your SSH keys regularly to reduce risk. Avoid using old or shared keys.
- Use AWS KMS encryption for storing sensitive keys or credentials securely.
Network Security
- Limit security group rules to allow SSH (port 22) access only from trusted IP addresses.
- Enable AWS MFA (Multi-Factor Authentication) on your AWS account to add another layer of protection.
WinSCP Hardening
- Avoid using plain FTP, which sends data unencrypted. Stick with SFTP or SCP for file transfers.
- Only use SCP fallback if absolutely necessary, as it’s less secure than SFTP.
Compliance
- Follow logging standards required by GDPR or HIPAA if applicable to your business. WinSCP supports secure protocols and detailed transfer logs to help with this.
Common Pitfalls
- Never expose your private keys or upload them anywhere public.
- Regularly scan uploaded files for malware before running or distributing them on your EC2 instance.
Keeping these security basics in place means your cloud server file management stays safe, especially when connecting via WinSCP.
For more on secure file transfers, see our guides on WinSCP SSH key authentication and best practices for AWS EC2 file management.
Troubleshooting Common Issues and Quick Fixes
Running into trouble while connecting to AWS EC2 with WinSCP? Here are quick fixes for the most common problems:
-
Connection Refused
Double-check your EC2 instance status in the AWS console. Make sure it’s running and your security group allows inbound SSH (port 22) from your IP. Also, verify the instance’s public IP or DNS is correct.
-
Permission Denied on Upload
If you see permission errors when uploading files, you might not have write access. Connect via SSH and run sudo chown -R ec2-user:ec2-user /path/to/directory (replace ec2-user with your username). This sets the right ownership so WinSCP can upload files.
-
Slow Transfers
Slow file transfers can be frustrating. Try optimizing your network by adjusting the MTU size on your client or server. For heavy data loads, consider using AWS Direct Connect for a faster, dedicated link.
-
Windows Quirks
On Windows, User Account Control (UAC) might block WinSCP from saving files in some folders. Running WinSCP as an administrator often solves these permission issues.
-
FAQ Highlights
- Multi-instance setup? Save separate site profiles in WinSCP and consider using AWS Systems Manager for keyless access.
- Windows Server on EC2? Use the RDP method for file transfers or enable WinSCP’s SCP mode if SSH is set up.
- Looking for free alternatives? FileZilla and Cyberduck are popular, but WinSCP stands out for seamless SCP/SFTP with PuTTY integration.
For more troubleshooting tips and detailed guides, check out WinSCP’s knowledge base.